I have Python 2.7 and 3.5 both installed on my Windows machine and several times I wanted install some new package I’ve ended up with the “No module names ‘xxx’” message although I had just installed the package! Every time I end up resolving the issue somehow, but I keep forgetting what I did exactly to resolve after a few weeks. Today I tried installing Seaborn and ran into the same issue. Spent a good 1-2hrs trying to recall what I did last time I ran into this issue and also Googling, but I couldn’t find anything online that had a easy to follow set of instructions, so I thought I’d write my own post.
I installed Python using the Conda installer, so on my machine I have Anacond2 and Anaconda3 folders corresponding to 2.7 and 3.5 respectively.
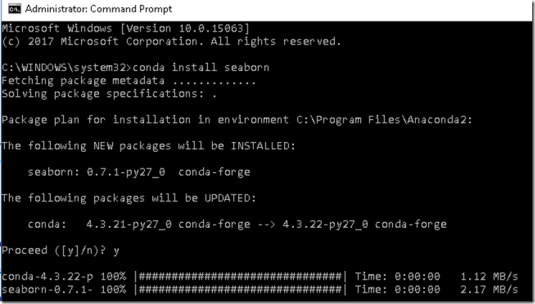
I opened a Command Prompt as Admin and then did “conda install seaborn” and it did the following:
Seems like seaborn should be available now, but I was getting the “No module named ‘seaborn’” error when I tried importing:
It makes sense since the installer actually says “Package will be installed in C:\Program Files\Anaconda2”, and in the Jupyter environment I was using the Python3.5 kernal.
Tried installing seaborn again, but this time from the Anaconda3 folder thinking it’ll make a difference, but the installer thinks it’s already installed (which also confirms that where you run the installer from has no effect).
There can be several solutions I think, including having your own ‘conda environments’ as outlined at https://conda.io/docs/py2or3.html, but it wasn’t quite straightforward to figure out what to do in a Windows environment. Most of the StackOverflow posts were related to Linux installations as well.
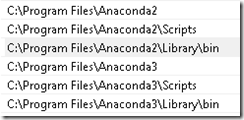
After playing around for sometime, what I did was changing the order of the Environment Variables.
This is what I had:
I changed the order to the following so that the 3.5 version is at the top.:
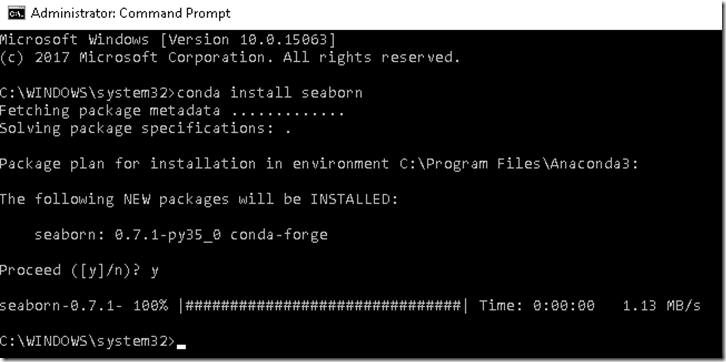
Opened a new Command Prompt as admin and tried installing seaborn:
Perfect! Installation folder now shows “C:\Program Files\Anaconda3” and when I goto C:\Program Files\Anaconda3\pkgs, it actually shows what was just installed:
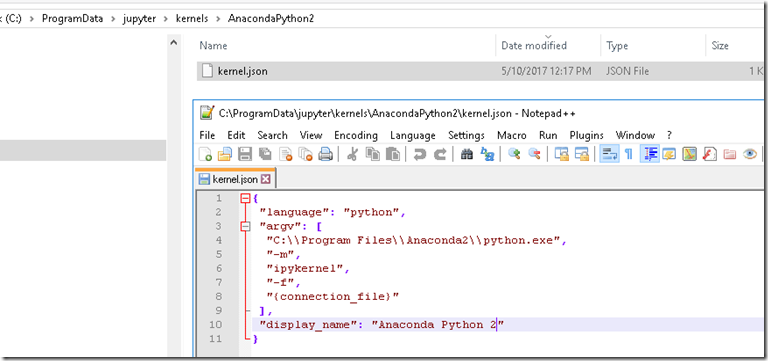
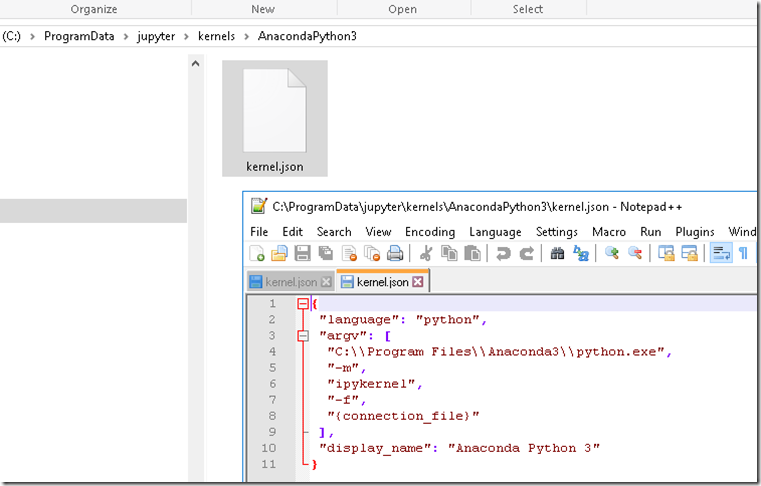
On a related note, you can manage the different kernals that show up in Jupyter as well by having the kernal config files at C:\ProgramData\jupyter\kernels.
In my case, I have 2 separate folders, with each folder containing a kernal.json file that looks like:
and:
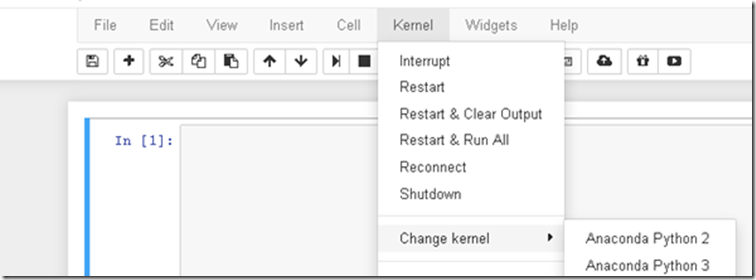
This way, when I open Jupyter, I can easily select between a Python2 notebook and a Python3 notebook:
Hope this helps! Also, feel free to let me know if there’s a better way to do this.


